
Simplest recipe ever, two ingredients: equal amounts flour and water. :)
It's what you do with them that makes the magic happen. If you just combine the flour and water, you'll get a mess that doesn't do much of anything. This flour likes to be cooked 2-3 times, so here's how you do it
Measure 1.5 cups of singoda flour into a glass bowl. Add a healthy pinch of salt if you want some extra flavor. Bring some water to a boil and while it's boiling hot, add 1.5 cups to the flour and stir quickly with a wooden spoon. It will start to gel a little, but not much will happen yet.

Cover the glass dish and microwave on high for three minutes. When it comes out, it will be darker in color and bounce back when you press on it. Using a spatula, turn the whole disk over, and you will see that the center of the bottom is still gooey. (For non-microwavers, I feel you cringing. We didn't use a microwave in our house at all for about 15 years, but there was one in the RV when we bought it, and I'm actually glad, because as far I as I tell, there isn't another way to make this recipe work otherwise. I suppose you could try baking it slowly, but I haven't tried that method.)


Back in the microwave for about a minute and a half, and now the whole disk will be cooked through. It has magically turned into a dough! We used to then knead the disk into a log before cutting into equal portions, but now our time-saving method is this: we just turn out the disk onto the cutting board and cut into equal portions, and then roll them into balls, ready for the tortilla press.


Since we didn't knead the dough, the outside of the circle will likely be more cooked than the center, so when you press your dough, there might be one section that is denser/more clumpy, like this:
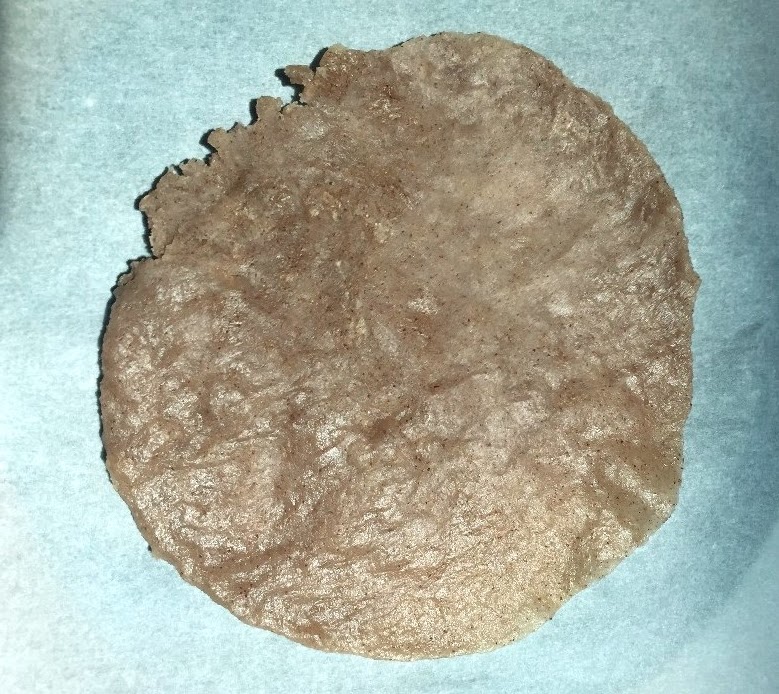
Hard to see because the lighting in the RV was terrible by this time, but the 10-11:00 portion of this tortilla is not as soft or as uniform as the rest. What I do is fold the tortilla up with the overly-cooked portion in the center of the pillow, and re-press, basically letting the tortilla press do the kneading work for me. The resulting chapati should be perfect!


This dough will only perform for you while it's warm, so work quickly (one reason we stopped the kneading thing. . .this goes faster). If it cools down too much to press, just pop your pieces in the microwave for 20 seconds or so and try again. Put them on a plate as you go - the dough isn't sticky by this time, so you don't even need parchment or plastic in between layers.

Now you'll heat an iron skillet, rub a little oil (avocado, olive, or bacon fat, preferably) on the surface, and cook the chapatis on both sides. As they cook, they'll change color again, becoming a little lighter in appearance with golden brown spots, so you can see when they're finished.

Almost done! You could eat them like this, but they are SIGNIFICANTLY improved if you cook them directly on the fire of your stove. Place them directly on the flame and let them get a bit of char. These are a great bread substitute, and especially delicious with ghee (a reintroduction if you are strict AIP) and salt.

It might seem like a lot of steps here with all the photos, but it's pretty fast, actually. We make a double batch and keep them in the fridge before the charring step, then just throw on the flame to heat up for meals. If you're traveling, char them first, then store in a plastic bag on your dash and they'll be warm for lunch. Great as a "wrap" substitute, with lunchmeat and fixin's, although mine aren't big enough to actually wrap into rolls. . .more of a hearty sandwich taco. :)
No comments:
Post a Comment