Intro to AIP

Intro to AIP, just in case you happen by this blog and don't know what it is:
The Auto-Immune Protocol is an elimination diet designed to help people with auto-immune issues, leaky gut, adrenal fatigue, allergies, and health problems that spring up due to any combination of the above. By eliminating all grains, dairy, nuts, seeds, eggs, and nightshades (tomatoes, potatoes, peppers, and eggplant), we are able to achieve a "clean slate" so to speak, free of allergens in our food that may be exacerbating our symptoms. Once our health returns, we slowly reintroduce foods and are able to see which foods are healthful and which we should continue to avoid. Much more on the AIP and it's How-and-Whys can be found on Sarah Balantine's blog Paleomom.


Plantain Muffins, Sweet and Savory (even Olive-Rosemary flavored!)

These are another AIP staple for us, and we have sweet and savory versions. Sweet ones are great for breakfast or snacks, and savory ones are perfect for making little sandwiches for lunch.

The hardest part about making these muffins is consistency, because their success is based completely on the ripeness of your plantains, which can be very variable. If it's hot, the plantains that were perfect at 8am might be too ripe by 4pm when you finally get the time to bake them! Don't be afraid to try them through, because with practice, they become a fantastic addition to your AIP arsenal. (Note: this recipe has flaxseed in it, which is technically a reintroduction. You could try it subbing gelatin eggs for the flax if you aren't ready to try the seed.)

So, the plantains.


The plantains here in the front are just about what you're looking for, especially for savory muffins...maybe one more day for sweet. The yellow/brown ones in the back are too ripe.

If you use plantains that are too ripe, they will take FOREVER to bake, and will remain very wet inside, even after baking for over an hour. If this happens, don't throw them out! Freeze them, and then re-heat in the oven (toaster oven, whatever) until the outsides are crispy. They're quite delicious this way, but wouldn't be something we would necessarily serve to guests, know what I mean?? :D


Sweet Plantain Muffins

4 ripe-but-not-yet-browning plantains
3/4 cup golden flaxseed meal (regular is okay, but golden is better)
1.5 cups warm water
1 tsp apple cider vinegar
1 Tbsp vanilla 
1.5 tsp baking soda
1/2 tsp salt
3/4 cup arrowroot
6 Tbsp coconut sugar
1/3 cup palm shortening, melted

Peel, chop, and then blend plantains in a food processor until smooth.
Mix flax, water, vinegar, and vanilla in a bowl and let sit about ten minutes, whipping with a fork randomly. The more you whip it, the more gelatinous it will become. It should look like egg-consistency when it's ready.
Add baking soda, salt, tapioca, and sugar to the plantains (we do all of this in the food processor) and mix.
Add melted shortening, pulse, add wet flax mixture. Blend for about 2 minutes.

We bake these in silicone muffins pans; originally we used cupcake papers in regular tins, but much of the muffin ended up sticking to the paper (even with oil), and this way we get 100% of the muffins to eat. 

Once we scoop all the batter, we add blueberries and/or raspberries and/or Enjoy Life chocolate chips (reintroduction!) to each individual cup. It just works better this way.

Oven should be about 375 degrees, and they take quite a while. We check at 35 minutes, and then every ten minutes, but they will likely bake for an hour or up to 90 minutes. I know that's a huge variable, but it all depends on the particular plantains you have that day. If, after, 75-90 minutes they still seem soft, take them out and let them cool completely, then freeze. They are actually really delicious once reheated to make the outside crispy.


Savory Plantain Muffins (optional Olive-Rosemary Muffins)

Same as above, EXCEPT:

  • Plantains should be a day or two less ripe (greener) than described above
  • OMIT the sugar and vanilla
If you want to get fancy, when you melt your shortening, add some rosemary to the oil and let it steep for about 15 minutes, and then remove the herb. Then you will have rosemary-flavored plantain muffins, and you can even add good olives to the muffins before baking and then you have fancy olive-rosemary plantain bread!




Singoda Chapati (Water Chestnut Flatbread)

Singoda flour isn't one you've probably heard of; it's made from water chestnuts and used in traditional Indian cooking. You can buy it online, but it's significantly cheaper to find an Indian market (like $4 a bag instead of $11). Brand does matter - I wish I had a list of all the brands we've encountered across the country, but suffice it to say that not all are equal - not all are even water chestnut! We've seen flour labeled singoda (or singhoda) which is really buckwheat! So try to make sure the ingredients specify water chestnut. We like this brand:


Simplest recipe ever, two ingredients: equal amounts flour and water. :)

It's what you do with them that makes the magic happen. If you just combine the flour and water, you'll get a mess that doesn't do much of anything. This flour likes to be cooked 2-3 times, so here's how you do it

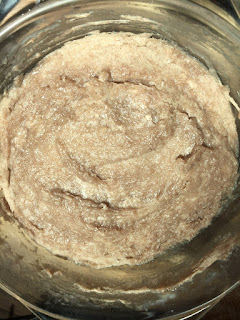
Measure 1.5 cups of singoda flour into a glass bowl. Add a healthy pinch of salt if you want some extra flavor. Bring some water to a boil and while it's boiling hot, add 1.5 cups to the flour and stir quickly with a wooden spoon. It will start to gel a little, but not much will happen yet. 


Cover the glass dish and microwave on high for three minutes. When it comes out, it will be darker in color and bounce back when you press on it. Using a spatula, turn the whole disk over, and you will see that the center of the bottom is still gooey. (For non-microwavers, I feel you cringing. We didn't use a microwave in our house at all for about 15 years, but there was one in the RV when we bought it, and I'm actually glad, because as far I as I tell, there isn't another way to make this recipe work otherwise. I suppose you could try baking it slowly, but I haven't tried that method.)


Back in the microwave for about a minute and a half, and now the whole disk will be cooked through. It has magically turned into a dough! We used to then knead the disk into a log before cutting into equal portions, but now our time-saving method is this: we just turn out the disk onto the cutting board and cut into equal portions, and then roll them into balls, ready for the tortilla press.


Since we didn't knead the dough, the outside of the circle will likely be more cooked than the center, so when you press your dough, there might be one section that is denser/more clumpy, like this:


Hard to see because the lighting in the RV was terrible by this time, but the 10-11:00 portion of this tortilla is not as soft or as uniform as the rest. What I do is fold the tortilla up with the overly-cooked portion in the center of the pillow, and re-press, basically letting the tortilla press do the kneading work for me. The resulting chapati should be perfect!


This dough will only perform for you while it's warm, so work quickly (one reason we stopped the kneading thing. . .this goes faster). If it cools down too much to press, just pop your pieces in the microwave for 20 seconds or so and try again. Put them on a plate as you go - the dough isn't sticky by this time, so you don't even need parchment or plastic in between layers.


Now you'll heat an iron skillet, rub a little oil (avocado, olive, or bacon fat, preferably) on the surface, and cook the chapatis on both sides. As they cook, they'll change color again, becoming a little lighter in appearance with golden brown spots, so you can see when they're finished.


Almost done! You could eat them like this, but they are SIGNIFICANTLY improved if you cook them directly on the fire of your stove. Place them directly on the flame and let them get a bit of char. These are a great bread substitute, and especially delicious with ghee (a reintroduction if you are strict AIP) and salt.


It might seem like a lot of steps here with all the photos, but it's pretty fast, actually. We make a double batch and keep them in the fridge before the charring step, then just throw on the flame to heat up for meals. If you're traveling, char them first, then store in a plastic bag on your dash and they'll be warm for lunch. Great as a "wrap" substitute, with lunchmeat and fixin's, although mine aren't big enough to actually wrap into rolls. . .more of a hearty sandwich taco. :)


Cassava Flour Tortillas


We make these a few times a week to use as a bread replacement for lunches and dinners. Ordering cassava flour from Amazon has been more convenient for us than trying to find frozen grated cassava for the other type of tortillas we like. (For quite a while, we've only been able to find the grated cassava that has preservatives added, which we are unwilling to eat, and it's also faster and more convenient than boiling fresh yuca root to make the whole thing from scratch-scratch.)

I was going to type out our recipe, because I couldn't remember where we got it from, but I found it! We basically use this recipe: http://theurbanposer.com/cassava-flour-tortillas/


1 1/2 cups Cassava Flour

6 tablespoons arrowroot flour
2 tablespoons ground golden flax seed
1/2 teaspoon salt
6 tablespoons melted fat(s) of choice (palm shortening, lard, ghee, coconut oil)
3/4 cup (possibly a little more) lukewarm water


Go see the post, because she's got some great info about cassava flour, although I don't agree that it is a good substitute for a lot of baking. Apparently some people are subbing it 1:1 for wheat flour, but we've had terrible results with most of our experiments. We do like it for these tortillas, and we use it for cookies, but breads and cakes are a no-go. You might need more water than she calls for, but it depends on humidity, etc. We often use half palm shortening and half coconut oil, instead of just one fat. We also sprinkle a small amount of fine sea salt on top when we first add them to the pan to cook, just for yum. :)


Remember if you are still strict AIP, flax seeds are a reintroduction. We do like the golden flax better than regular for this recipe, and we always use a tortilla press...rolling by hand would make a 3x/week chore unnecessarily loooong. The press makes everything come out in a uniform way and when you use parchment to avoid sticking, it comes together really fast. Most bloggers sharing cassava flour recipes seem to be pushing Otto's brand, but we use Anthony's, which is significantly less expensive.

We make a double batch (about 40 tortillas) and store in the fridge in a large plastic bag; they heat up great in a toaster oven or iron skillet. Great to pack for lunch on travel days! (Pro tip: put your tortillas, muffins, or breads on the dashboard while you drive and they'll be warm and extra delicious whenever you want them!)


The Recipe to Rule All Recipes

Honestly, this one is PRECIOUS. I know you've been missing flour tortillas and fried dumplings.

Yuca root is a versatile starch worth checking out. It can replace your grains and potatoes and give you the illusion of normal eating. Yuca root is also called cassava, tapioca, and manioc. You'll be looking for either the fresh roots, or frozen varieties in your local asian market. To help in your search, we've noticed that fresh root is usually called yuca, or manioc in latin markets, the frozen is called cassava, and the flour is called tapioca. All the same ingredient though!

In addition to the yuca, you'll need a little oil and salt, and for hardware, a food processor, a piece of parchment, and a tortilla press.

If you find the frozen grated cassava, make sure it's a brand without preservatives. There are several brands out there, so just check the ingredients. We have found these pretty consistently all across the country, even if we've had to check out multiple asian markets in one city. It's typically easier to find the fresh roots though; many supermarkets carry them. You will generally have a better chance of finding them in mainstream supermarkets rather than health food stores, since they're not a locally-grown food. Ethnic markets are GOLDEN for this ingredient.

For these tortillas/wrappers, we prefer the frozen version, but that's just because it takes a lot of time off the process of peeling. Fresh yuca roots are often "yucky" (see what I did there) in the middle (making them unusable), which you don't know until you peel them; the frozen ones are obviously good, pre-measured, and grated, too. woo!

If using fresh, peel the outer layer off using a sharp knife, then feed into a food processor to grate. You're going to want about 2 cups of grated yuca. If using frozen, thaw a bag (or do two at a time to make a lot, to freeze later) and empty into a towel or some cheesecloth. You need to wring out most of the water. You don't want it totally dry, but mostly dry.
In a covered glass dish, microwave for three minutes. For non-microwavers, I feel you cringing. We didn't use a microwave in our house at all for about 15 years, but there was one in the RV when we bought it, and it's the perfect application for this particular recipe. There is a way to do this without a microwave, but you can ONLY use fresh yuca, which you boil before pureéing, and we've found this to be too-wet of a dough in the end. The only way to know is to try it! :) If you're still with me, after the three minutes (be careful of the steam when taking the lid off!), your yuca will have some drier, cooked areas around the edges (which you can see in the first photo below), and that's how you know it's cooked enough. Due to varied water content, humidity, etc., sometimes you'll need an extra 30 seconds or so; you'll learn it by trial and error.
Next, you'll transfer the hot yuca into a food processor, add a small splash of olive or avocado oil (about a tablespoon per two cups of yuca) and a dash of salt (about half a teaspoon). Mix that up until you get a soft, perfectly pliable dough. You won't believe that essentially one ingredient - the yuca - is going to make such a perfect dough. It's seriously magic.

Next, grab a piece of parchment twice the size of your tortilla press, fold in half. Take a piece of dough about the size of a ping pong ball, sandwich it in the parchment, and press. Lift the press, turn the tortilla 90 degrees, and press again. Voilá!

Stack your tortillas individually on a plate, with plastic wrap or parchment in between layers. You can cook them now, or freeze for later. We usually stick the whole plate in the freezer and then once they're frozen we transfer the individual tortillas into a large plastic bag and return to the freezer.

To cook into tortillas, just heat in a hot pan (we use cast iron) with a little oil until they begin to brown on each side. To make into potstickers, wrap your AIP filling of choice and then pan-fry in a little oil.

We added a lot of photos here, but it's not really complicated or too time consuming at all. Thaw, squeeze, cook for three minutes, pulse for a couple minutes in the processor, press. 15-20 minutes tops, depending on how big of a batch you make. TOTALLY WORTH IT!

Let us know how it works for you!

Nourishing Nibbles


These are a delicious, nutrition-packed granola bar sort of thing. Great for breakfast (cookies for breakfast!), snacks, or road food. As a gluten-free eater, these have saved my life while travelling, so I always try to keep some with me.

Those familiar with WAP/NT (Weston A Price/Nourishing Traditions) will notice that I soak my grains and seeds; this is to both release enzyme inhibitors (phytic acid) and to WAKE UP the food, turning it into a living food. I do turn around and kill it in the oven (heh) but it's still an important step if you want your food to have more available nutrients. The soaked millet and oats are both 15% protein, the sunflower seeds are 25% protein. Millet and Oats have Vitamins B, C and E, Calcium, Iron, Magnesium, Pantothenic Acid, Phosphorus and Amino Acids. . .good stuff, right??

Before I begin, please know that nothing here really needs to be measured, and you can treat nearly all the ingredients as optional; put in what you like, leave out what you don't, come up with additions of your own!

This is a VERY EASY recipe, which I am typing out in detail, so it looks like a lot, but it's not, okay? ;) It's a friendly, forgiving kitchen-sink-type recipe. :)

Okay, so you start this recipe the night before you want to finish it. Start with 2 cups of whole grain millet in a large bowl, and cover with water. Stir to make sure there aren't any air pockets. You want this to soak for 8-12 hours, so I find overnight to be easiest.

In the morning, strain the millet and rinse. Then put it into a pot with 6 cups of water and cook it, uncovered, on low, stirring occasionally. This is like making oatmeal or any type of porridge. Add a cup of raisins and a cup of dried cranberries (or whatever dried fruit you like) to the water, so they will rehydrate and flavor the millet at the same time.

As soon as your millet is cooking, put about a cup and a half of rolled oats and about a cup of sunflower seeds in a bowl and cover with water. These will soak for about 30 minutes.

(Note: If you are in a hurry for a healthy snack and don't have time to soak millet, oats, or seeds, no biggie! It's more nutritious when soaked, but will still be healthy and yummy without that step.)

Grate about 3 carrots and 1 apple. I do mine by hand on a box grater that has a medium-fine side (not zest or chocolate, not cheese. . .it's sort of wavy and I'm not sure what it's supposed to be for, technically), so I don't cook them. If you only have a larger-holed cheese grater, you may want to sweat the carrots in a pan before adding them to the dough. Not necessary, but it's nice to keep all the ingredients soft. Put in a large mixing bowl, or in the bowl of your stand mixer if you want to use that.

Also optional at this point are grated zucchini or squash. In my last batch (seen above), I even added a handful of leftover steamed broccoli, cut up very finely. Probably about half a cup of whatever veggies you like.

When the fruit/millet's water is mostly absorbed and it looks like porridge (not too thick, not watery either), remove from heat and let it start to cool.

Drain the oats and seeds and add to the carrot/apple/veggie mixture.
Add 1/2 cup shredded coconut, vanilla (I use about 3 Tbs. vanilla powder, because I enjoy the flavor much more than the liquid, but use whatever you have, or omit vanilla and use 1/2 tsp. cinnamon and 1/2 tsp. nutmeg or allspice, for a totally different feel), 1/2 tsp. sea salt, at least 1 cup chopped walnuts (I use more, but I like them very nutty. . .also, use whatever nuts you like, if walnuts aren't your favorite). Can also add half a cup of rapadura and/or maple syrup (with both, they really taste more like cookies, which might be a good way to introduce them to finicky eaters. just cut back a little on the sugar with each batch, and soon the plump raisins will be enough sweetness all on their own). In my last batch I also added the fermented fruit (chopped) and some of the grains from my water kefir.

Now add your partially-cooled fruit/millet mixture and thoroughly combine.

At this point, see what your mixture looks like. Is it dry and crumbly, or wet and soupy? It will really depend on what you've chosen to add and what the consistency of your millet was when you stopped cooking it. If your dough is dry and crumbly, you will want to add an egg (or possibly 2). You want it to be pretty wet, but not soupy. If it's too wet, you can add more rolled oats (just do a handful at a time until it's a good consistency). 

I use an ice cream scoop to drop the dough onto a parchment-lined cookie sheet. After the whole sheet is full, run your hand under water and press the back of your fingers over each dough mound to flatten into cookie shapes. The water keeps the dough from sticking to your fingers. :)

Next time I make these, maybe I'll try to take photos of the whole process, in case there are questions.

Pop into a 350* oven for about 45-60 minutes. Again, it will depend on what you added/how wet or dry. I have made both ways; dry dough creates a yummy but crumbly cookie, wet dough creates an extra-delicious cookie that's moist on the inside and crispy on the outside, and travels better. Remove from the oven when they *just* start to brown. I prefer these warm, so underbaking a bit is nice, if you plan on re-heating each time you want a snack (I heat mine in the toaster oven, and it's like having freshly-baked cookies each time).

To print out, here's the basic ingredients:

2 cups whole grain millet (soaked 8-12 hours and then cooked into a porridge with 6 cups water)
1/2 to 1 cup raisins (re-hydrate in the millet water)
1/2 to 1 cup dried cranberries  (re-hydrate in the millet water)
1 1/2 cups rolled oats, soaked 30 min.
1 cup sunflower seeds, soaked 30 min.
3-4 carrots, shredded (sweat in a pan over low heat if coarsely shredded)
1 apple, shredded
1 zucchini/squash/other veg, shredded
1/2 cup shredded coconut (not sweetened!)
3 Tbsp. vanilla powder (or regular liquid, if that's what you have, OR, 1/2 tsp. cinnamon and 1/2 tsp. nutmeg or allspice for spiced cookies)
1/2 tsp. sea salt
at least 1 cup chopped walnuts (or whatever nuts you like)
1/2 cup rapadura or maple syrup (or brown sugar, if that's all you have)

Makes a lot. . .about 40-50 cookies. :)

I forgot to say that I normally freeze most of them. They are delicious, but even I can't eat 40 before they go moldy. :D (they heat in the toaster oven marvelously; like eating freshly baked!)